You usually only notice your baseboards when they look wrong, gaps you see from the couch, corners that don’t quite meet, or a room that still feels “unfinished” even though the paint is dry.
The good news is that most bad baseboard installation is easy to spot and, in many cases, fixed. As a small project handyman team on the North Shore, we see the same problems over and over. This guide walks through the most common baseboard installation mistakes we fix for homeowners, how to prevent them, and when calling a pro is worth it.
Contents
- TL;DR:
- What does bad baseboard installation look like?
- 9 common baseboard installation mistakes homeowners make
- 1. Nailing into drywall instead of solid backing
- 2. Skipping coping on inside corners
- 3. Not scribing to uneven floors and walls
- 4. Relying on caulk to hide everything
- 5. Choosing the wrong profile or size
- 6. Using MDF where solid wood makes more sense
- 7. Rushing the prep and paint
- 8. Awkward transitions at doors and stairs
- 9. No plan for expansion over long runs
- Quick reference: symptom vs likely cause
- How to avoid baseboard installation mistakes on your next project
- Can you fix bad baseboard installation without ripping everything out?
- When to call a handyman instead of DIY
- FAQs
TL;DR:
Quick signs your baseboards were installed poorly:
- Visible gaps at the floor or wall after caulking and painting
- Inside corners with open joints instead of tight, coped cuts
- Nail holes filled badly or not at all
- Baseboards pulling away from the wall or moving when bumped
- Profiles or heights that clash with your doors and casings
If more than two of these sound familiar, the trim probably needs help. Later in this article you’ll find a step by step approach and when it makes sense to book a handyman visit.
What does bad baseboard installation look like?
A clean baseboard line should look like one continuous ribbon around the room. In BC’s climate and with our typical drywall and flooring, perfection isn’t realistic, but good trim work comes close.
Common red flags include:
- Uneven top line: the baseboard waves up and down along the wall.
- Gaps at the floor: especially over tile or older hardwood with dips.
- Messy corners: mitered joints that open up seasonally or never closed in the first place.
- Rough paint finish: nail holes and seams telegraphing through after painting.
- Water damage at the bottom edge: swelling MDF in bathrooms, entryways, or around exterior doors.
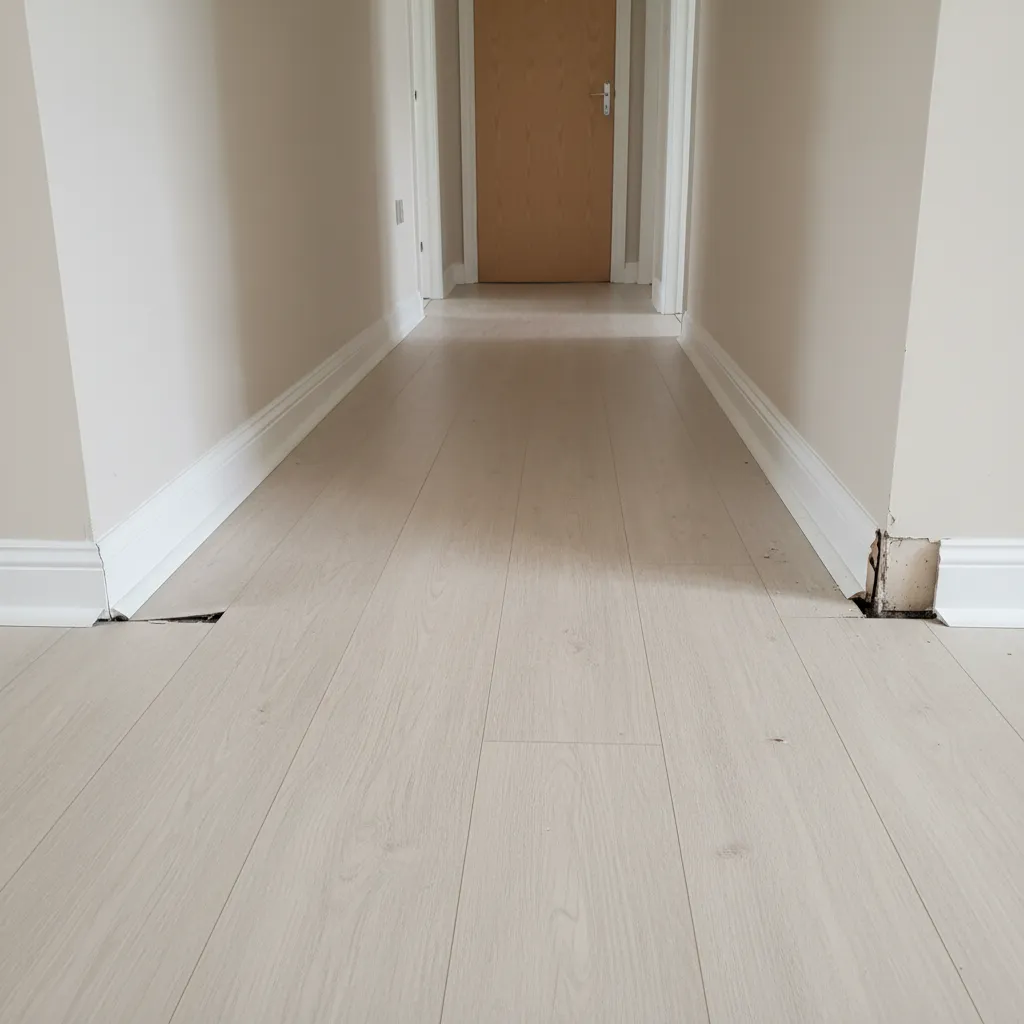
From a distance, waves, gaps, and open inside corners along a hallway baseboard are clear signs of bad baseboard installation.
The 3 Point Baseboard Check: Gaps, Corners, Moisture
When you walk into a room, quickly scan these three areas:
- Gaps: look for shadows or lines where the baseboard pulls away from the wall or floor.
- Corners: check whether inside corners are tight and coped, not cracked-open mitres.
- Moisture: watch for swelling, staining, or soft spots along bathroom, kitchen, and entry baseboards.
If two or more of these fail the check, it’s a sign the original baseboard work needs attention.
If you’re not sure whether what you’re seeing is normal, compare your room to photos from trusted sources such as This Old House trim examples.
9 common baseboard installation mistakes homeowners make
Here are the baseboard installation mistakes we fix most often for clients in North Vancouver, West Vancouver, and nearby areas.
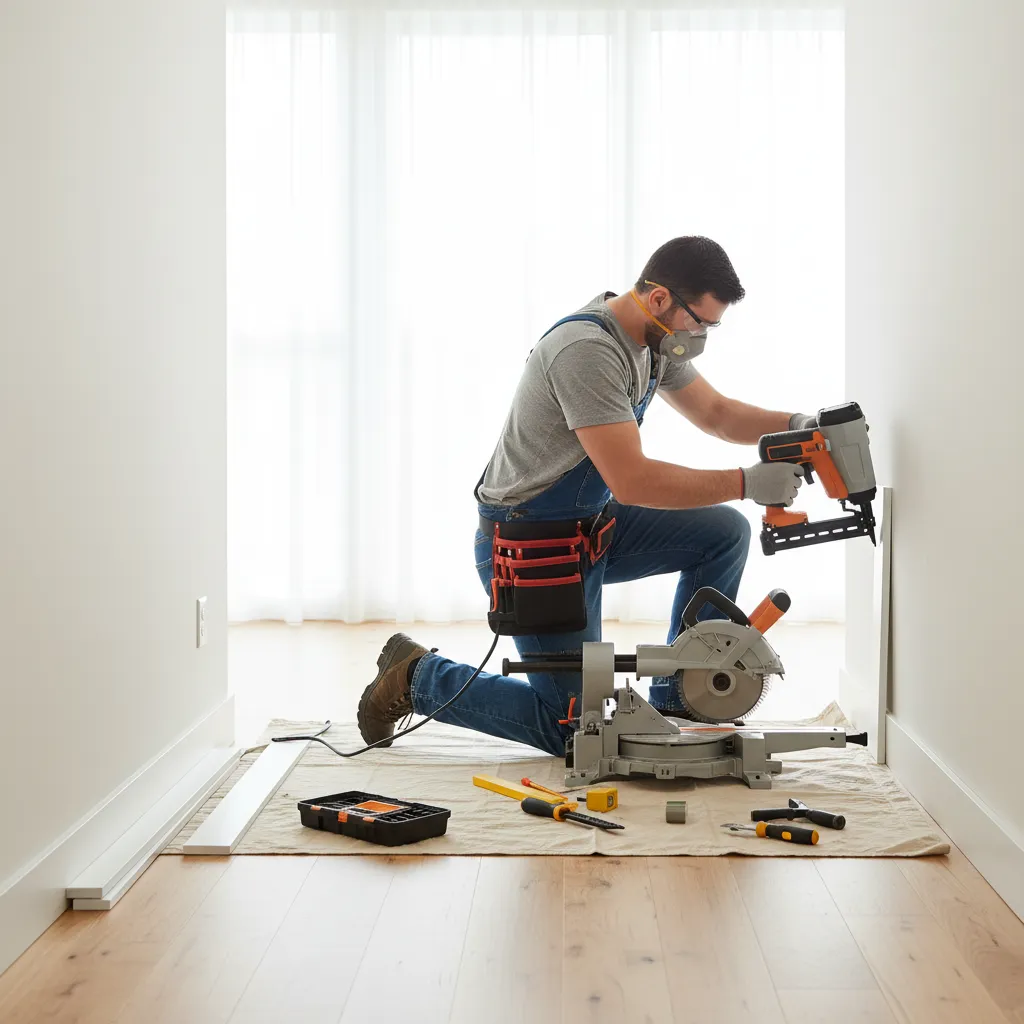
A detail oriented installer using the right tools helps prevent common baseboard installation mistakes from the start.
1. Nailing into drywall instead of solid backing
Baseboards that flex when you vacuum or bump them were probably nailed mostly into drywall. Drywall can’t hold finish nails well, so the trim loosens over time.
Better approach: Mark studs and nail into them. Where walls lack backing, add construction adhesive so the nails act as clamps instead of the only support.
2. Skipping coping on inside corners
DIY guides sometimes show two 45° miters meeting in the corner. In real houses with real drywall, those joints often open. A coped joint where one board is cut to match the profile of the other stays tighter through seasonal movement.
If your inside corners have visible openings, you’re seeing one of the most common baseboard installation mistakes.
3. Not scribing to uneven floors and walls
Older North Shore homes rarely have perfectly flat floors. If the installer just followed the floor, the top of the baseboard will wander. If they kept the top level, there may be big gaps at the floor.
A pro will often scribe the baseboard: trace the floor profile onto the board and shave the bottom to match. That keeps the top line straight while the bottom hugs the flooring.
4. Relying on caulk to hide everything
Caulk is for small gaps, not for rebuilding corners or filling wide cracks. Overfilled joints shrink, crack, and show through paint. Using the wrong caulk in a damp area (like a non‑paintable latex behind a shower curtain) can also cause peeling and staining.
Check the label and use a paintable interior caulk from a reputable brand. The Government of Canada’s DIY chemical safety guide is a good reference for safe products and use.
Caulk should seal tiny seams, not rebuild bad corners or hide wide gaps.
5. Choosing the wrong profile or size
The small, flat baseboard in a 9 foot ceiling living room tends to look underwhelming. On the flip side, overly tall and ornate trim around short doors looks off. We also often see mismatched profiles added during past renovations.
As a rough guide, 3¼”–4¼” baseboards suit most 8‑foot rooms; go taller with higher ceilings, but match the home’s style first. If you’re updating other trim at the same time, it may fall under our trim & moulding service.
6. Using MDF where solid wood makes more sense
MDF baseboards are common and work well in many dry rooms. Near entry doors, in bathrooms, or anywhere mops and wet boots live, it can swell and crumble. Once the bottom edge soaks up water, there’s no real fix besides replacement.
In splash prone areas, we usually suggest finger jointed pine or another solid wood, well primed on all sides before installation. Vintage Mouldings’ FAQ on MDF in damp areas explains why both wood and MDF need sealing when moisture is present. Protecting vulnerable trim in those rooms and booking water damage restoration when leaks occur is about more than just cosmetics.
7. Rushing the prep and paint
Even beautifully cut trim looks unfinished if nail holes, joints, and end grain aren’t filled and sanded. Another giveaway of rushed work is glossy paint over dusty, unprimed MDF.
Better sequence: install, fill and sand, lightly caulk small joints, spot‑prime where needed, then apply two finish coats.
8. Awkward transitions at doors and stairs
The baseboard should die cleanly into door casings and stair stringers. We often see strange slivers, double joints, or gaps where no plan was made for how the profiles meet.
A small return piece or planned height change looks far better than a random off‑cut.
9. No plan for expansion over long runs
On long walls, especially with laminate or vinyl plank flooring that moves a bit, very tight baseboard runs can telegraph that movement. The result is separated joints or popped caulk.
Tiny, controlled gaps at coped or scarf joints, then caulk and paint, let the trim move without obvious cracks.
Quick reference: symptom vs likely cause
| What you see | Likely cause | Typical fix |
| Baseboard moves when kicked | Nailed only to drywall | Add fasteners into studs and adhesive on back |
| Open inside corners | Mitred instead of coped, or poor cuts | Re‑cut with coped joints, minor gaps caulked |
| Swollen bottom edge near door or tub | MDF in damp area, not sealed | Replace with sealed wood baseboard |
How to avoid baseboard installation mistakes on your next project
Planning and sequence do most of the heavy lifting. Here’s a simple roadmap busy homeowners can follow.
- Pick the right material and profile. Match existing doors and casings where you can. Use solid wood in moisture prone areas (see Mistake #6 on MDF vs wood).
- Pre‑prime and pre‑paint one coat. It’s much easier to paint baseboards on sawhorses than on your knees.
- Mark studs and problem spots on the wall. A pencil, a small level, and a decent stud finder help a lot.
- Start with the longest wall. Install full length pieces first, then work toward shorter walls and tricky corners.
- Cope inside corners. Use a miter saw to cut the profile, then a coping saw and file for the back cut.
- Nail into studs whenever possible. Use 15 or 16 gauge finish nails for thicker trim, 18 gauge brads for smaller.
- Fill, sand, and caulk sparingly. Small, neat fills are easier to hide than big blobs of filler or caulk.
- Finish with two top coats. A durable trim paint (often semi‑gloss) stands up better to kids, pets, and cleaning.
If that list already feels like a full weekend and a half, you’re the kind of client Microworks exists for. Our technicians handle trim work as part of wider to do lists, from small carpentry jobs and repairs to paint touch ups. If your project also includes casings or other wood details, it may fit best under our interior carpentry services.
Can you fix bad baseboard installation without ripping everything out?
In many homes we visit, we can improve the look of existing baseboards without a full replacement. The exact path depends on what went wrong.
- Minor gaps and nail holes: Usually fixed with proper filler, sanding, and repainting.
- Loose sections or one bad corner: Resecure into studs where possible, replace short damaged pieces, then touch up paint.
- Water damaged MDF: Best solved with new primed wood baseboard, at least in the affected areas.
During a typical Microworks half day visit, we might tighten loose trim, rework a couple of corners, and refresh paint so the whole room looks more intentional. On one 1980s townhouse job, that meant replacing swollen entry MDF with sealed wood and re‑coping cracked corners in a single visit.
When to call a handyman instead of DIY
Baseboard work lives in that middle ground: smaller than a renovation, but fussy enough to be frustrating. Bringing in a small project handyman usually makes sense when:
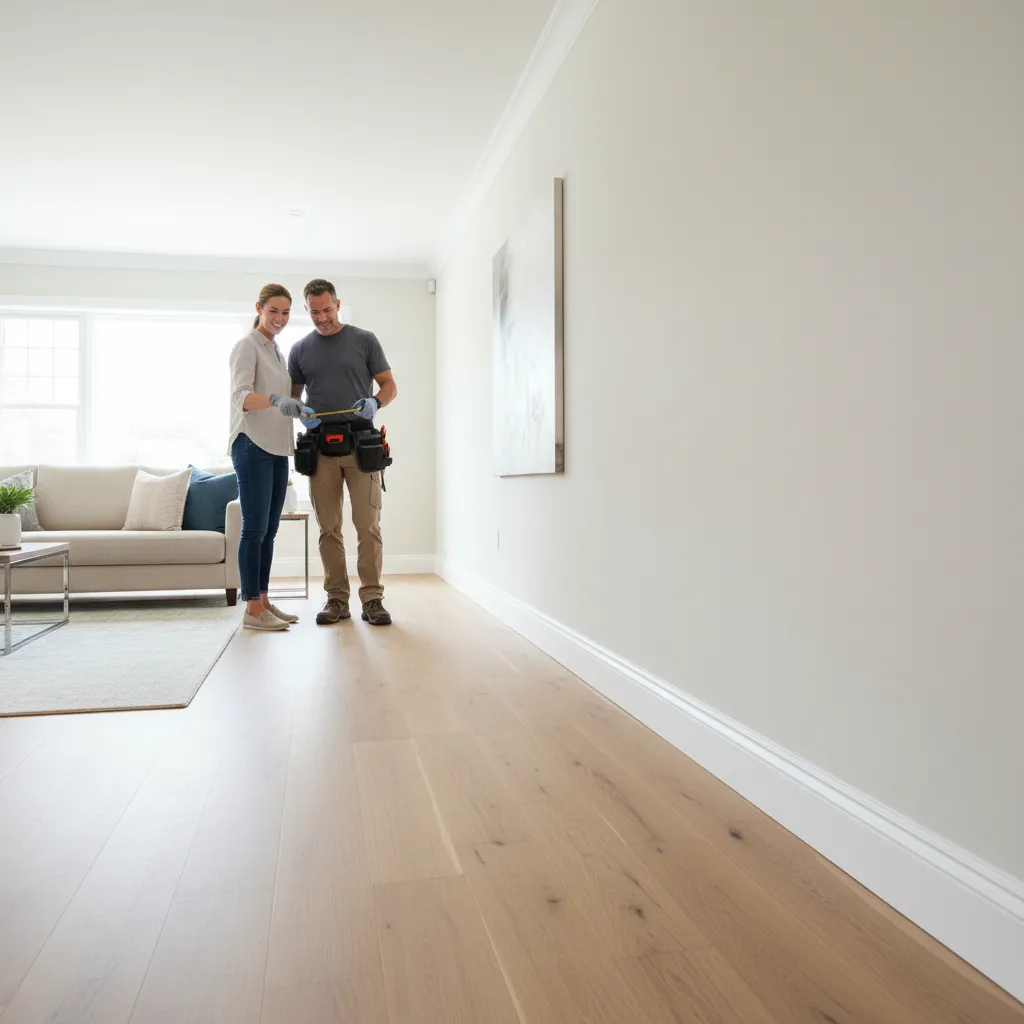
For tricky rooms and visible spaces, bringing in a handyman can be the fastest route to clean, professional looking baseboards.
- You don’t own a mitre saw, compressor, or nailer and don’t want to invest for a one‑off job.
- Your home has a lot of out of square corners, waves in the walls, or uneven floors.
- You’ve already tried once and ended up with more gaps and caulk than you’d like to admit.
- The work is in a high visibility space: entryway, main floor, or a home you’re about to list for sale.
- You’re coordinating several small tasks at once: trim repairs, door tweaks, paint touch ups, hardware swaps, and so on.
Microworks focuses on exactly these kinds of projects across North Vancouver, West Vancouver, Vancouver, Burnaby, Coquitlam, and Bowen Island. If your to‑do list includes baseboard repairs plus a few other items, you can request an estimate and we’ll help you bundle them into one efficient visit.
FAQs
What are the most common baseboard installation mistakes you see locally?
In 1960s–1990s North Shore homes, we see a lot of patches in MDF mixed with original wood trim, corners that were never coped, and baseboards that sit too low over newer flooring. In newer condos, the big complaint is usually thin, builder grade trim that was installed quickly and caulked heavily.
Is bad baseboard installation a building code issue?
In most cases, no. The BC Building Code cares about safety and performance more than appearance. Baseboards can look rough and still be legal. That said, poorly sealed trim in damp areas can contribute to moisture reaching drywall and framing, which is never ideal.
Will fixing my baseboards really change how the room feels?
Yes. Clean, consistent trim frames the walls and flooring, so everything else in the room looks more finished. Many clients tell us the house finally feels “done” after we sort out the baseboards, even when we haven’t changed anything major.