A damaged wardrobe can be frustrating, whether it’s sagging shelves, broken doors, or unstable framing. If you’re in Vancouver, North Vancouver, West Vancouver, or Burnaby and need a quick fix, here’s a professional guide to repairing your wardrobe yourself. And if you’d rather leave it to the experts, we’ll tell you how to reach us at the end.
Contents
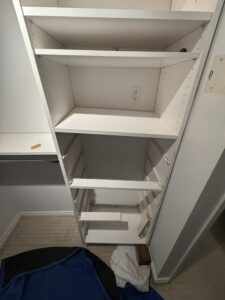
Step 1: Assess the Damage
Before starting any repairs, empty your wardrobe and inspect the wardrobe carefully. Check for:
- Loose or broken hinges
- Cracks or damage to the particle board
- Unstable framing
- Issues with wall attachment
Understanding the damage will help determine the best approach.


Step 2: Repairing Damaged Particle Board
Many wardrobes, especially those from big-box retailers, use particle board, which can crack or split over time. To fix this:
- Use a two-part fast-cure adhesive like 2P10 to bond broken pieces back together. You can grab this from Standard Building Supplies or Amazon. The reason why this product is great, is because it the accelerator is a spray and cures the glue immediately. even faster than superglue.
- Apply the adhesive to the damaged area and use clamps to hold it in place while it cures (it sets quickly, so work efficiently!). You might not even need clamps if using a product like 2P10
- If the damage is severe, reinforce the area with small wooden braces for extra stability, but cover them in wax paper so they don’t bond to the clamping surface.
Step 3: Securing the Wardrobe to the Wall
A wardrobe should be firmly anchored to the wall to prevent tipping, especially in earthquake-prone areas like Vancouver. Some installers will forget to install screws, or be so worried about hitting plumbing that they’ll just use the drywall for support. This works for a while, but using drywall only is a recipe for disaster long term.
Find the Studs
- Use a stud finder to locate solid points in the wall where you can attach the wardrobe.
- If the stud finder is inconclusive, you may need to open a small section of the wall using an oscillating tool to confirm the stud location and avoid hitting electrical or mechanical lines. Sometimes, we’ll make a hole in the wall the same size as an iphone and slip the Iphone in to take flash photos of the stud cavity.
Fasten the Wardrobe Securely
- Use long screws (preferably 2.5” or longer) to attach the wardrobe to the studs.
- If no studs are available where you need to anchor, install a cleat (a horizontal board secured to the studs) to provide a solid attachment point.
Step 4: Fixing Loose Doors and Hinges
- If the doors are sagging, tighten or replace the hinges.
- Use 3/16″ wood dowel and wood glue to fill stripped screw holes before reinstalling screws.
- For sliding doors, check and clean the tracks to ensure smooth movement.
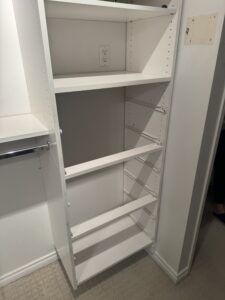
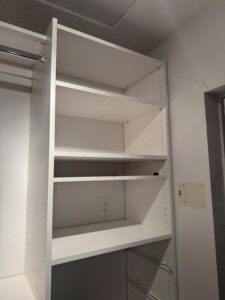
Step 5: Reinforce Shelves
Sagging shelves are a common problem, especially with particle board construction. Strengthen them by:
- Adding wooden cleats underneath for support.
- Replacing weak shelves with plywood or solid wood alternatives.
- Installing shelf brackets to distribute weight more evenly.
When to Call a Professional
If your wardrobe repair involves opening up the wall, securing heavy units, or dealing with extensive damage, professional help can save you time and frustration. At Microworks, we specialize in small handyman projects across Vancouver, North Vancouver, West Vancouver, and Burnaby.
Need assistance? Contact Microworks today! Call us or book a service online, and we’ll ensure your wardrobe is repaired safely and professionally.