If you’re planning to install a shed on your property in Vancouver, North Vancouver, West Vancouver, or Burnaby, the key to a long-lasting structure starts with a solid foundation. A well-built wood platform prevents sagging, keeps moisture at bay, and ensures your shed stays stable for years to come. In this guide, we’ll walk you through the steps to build a wood platform and properly assemble a shed, ensuring a strong and level base.
Contents
Step 1: Gather Your Materials and Tools
Before getting started, make sure you have everything you need:
Materials:
- Pressure-treated lumber (2×6 or 2×8 for framing, depending on shed size)
- Plywood (3/4-inch exterior-grade)
- Concrete foundation blocks, also known as deck bases
- Gravel (for drainage under the blocks)
- Galvanized nails or deck screws
Tools:
- Measuring tape
- Circular saw
- Drill with driver bits
- Shovel
- Level
- Framing square
- Construction calculator (we recommend this free app)
Step 2: Prepare the Foundation
A strong foundation ensures your shed remains level and resists shifting due to weather changes. Follow these steps:
- Mark Your Layout – Measure the shed footprint according to the manufacturer’s instructions and mark the corners using stakes and string.
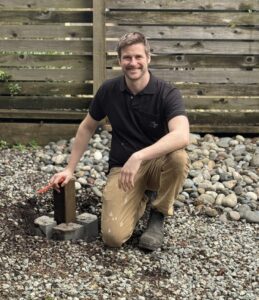
- Dig and Set Blocks – Dig at least 12 inches deep where the concrete foundation blocks will sit. This prevents movement from freeze-thaw cycles. Fill the bottom with a few inches of gravel for extra drainage.
- Level the Blocks – Place your blocks and use a level to ensure all of them sit evenly.
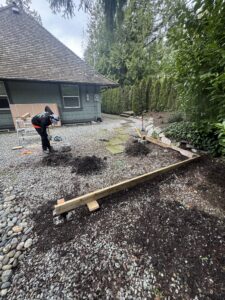
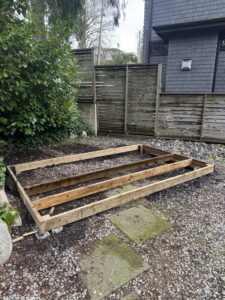
Step 3: Build the Wooden Platform
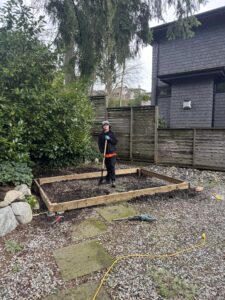
- Frame the Base – Cut pressure-treated lumber to the correct size and assemble a rectangular frame using galvanized nails or deck screws.
- Install Floor Joists – Space joists evenly (typically 16 inches apart) inside the frame for added strength.
- Attach Plywood – Securely fasten 3/4-inch pressure treated plywood to the joists, ensuring all edges are flush.

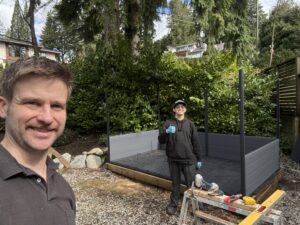
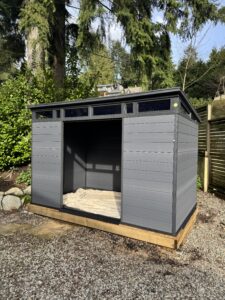
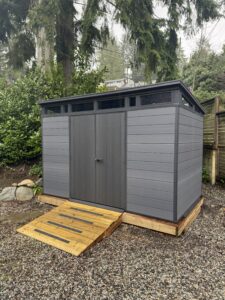
Step 4: Assemble the Shed
Now that your platform is ready, it’s time to put together the shed.
- Follow Manufacturer Instructions – Ensure you’re using the correct size fasteners and supports.
- Assemble Walls First – Secure each wall panel and check for level before fastening.
- Install the Roof – Attach roof trusses and secure the roofing material.
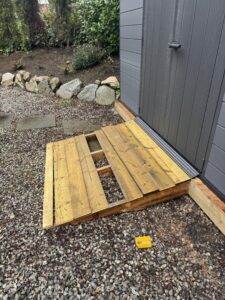
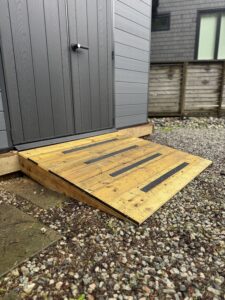
Step 5: Build a Ramp Using Simple Stair Math
A shed ramp makes moving heavy equipment in and out easier. Follow these steps:
- Measure the Height – Find the vertical distance from the ground to the shed floor.
- Use a Construction Calculator – Input the rise and desired slope to determine the length of your ramp boards. A free construction calculator app, like this one, makes this step simple. Input the height of the rise into the ‘rise’ portion of the app (ground to the top of the deck), input the desired length of the ramp into the ‘run’ area, then press the ‘diag’ button to get your diagonal dimension. Lay these measurements out on a 2×6 and you’ll have your ramp pieces. The 1x4s across the ramp can just be cut to length and screwed in place.
- Attach the Ramp – Use pressure-treated boards and secure them with galvanized screws.
Remember: Prioritize Safety with Proper PPE
Safety should always come first. Make sure to use:
- Safety Glasses – Protect your eyes from wood chips and dust.
- Gloves – Avoid splinters and sharp edges.
- Dust Mask – Prevent inhalation of sawdust.
- Steel-Toe Boots – Keep your feet safe from heavy materials.
For additional safety tips, refer to OSHA’s PPE guide.
Need a Professional? Microworks Handyman Can Help!
If you’d rather leave the hard work to the experts, our team at Microworks Handyman is here to help. We specialize in shed installations and custom wood platforms in Vancouver, North Vancouver, West Vancouver, and Burnaby. Contact us today for a hassle-free installation!
Visit our website to learn more about our services or check out our other blog posts for more home improvement tips.