Contents
- Accessible Home Modifications Checklist 2026 | Room by Room
- TL;DR:
- How to use this accessibility checklist
- Step 1: Safer entrances, paths, and parking
- Step 2: Bathroom upgrades for comfort and safety
- Step 3: Kitchen and laundry accessibility ideas
- Step 4: Bedrooms, hallways, and living areas
- Step 5: Whole home safety, lighting, and smart tech
- Budget, permits, and choosing the right help
- Room by room accessible remodeling checklist
- FAQs
Accessible Home Modifications Checklist 2026 | Room by Room
Small, thoughtful changes can make your home much safer and easier to use, whether you’re aging in place, recovering from an injury, or welcoming someone who uses a mobility aid.
This 2026 room by room checklist, based on accessibility work we do every week in North Vancouver, West Vancouver, Burnaby, and nearby neighbourhoods, highlights quick wins, larger upgrades to budget for, and when it makes sense to bring in a small project handyman or contractor.
TL;DR:
- Start at the entrances: at least one step free or ramped access, good lighting, lever handles, and slip resistant surfaces.
- Next, focus on the bathroom: walk in shower, secure grab bars, non-slip flooring, and a comfort height toilet.
- In the kitchen and laundry, prioritize reach: lower work zones, D shaped pulls, pull outs, and clear floor space.
- For bedrooms and living areas, widen pathways, adjust bed and seating heights, and control loose rugs and cords.
- Layer in lighting, handrails, and smart controls across the whole home.
- Work from a written checklist and tackle projects in phases so both the work and budget stay manageable.
“You usually don’t need a full renovation, thoughtful small projects can make a huge difference.”
How to use this accessibility checklist
Walk your home with this list on your phone or a print out, looking at each space from the perspective of someone using a cane, walker, or wheelchair. If you’re planning handicap accessible home modifications for a specific person, ask them to walk the space with you and point out problem spots.
As you go, sort each idea into what we call The 3 Tier Accessibility Plan:
- DIY today simple hardware swaps, lighting upgrades, and layout changes.
- Handyman projects grab bars, ramps, minor carpentry, and small plumbing or electrical adjustments.
- Larger renovations changing layouts, moving walls, or adding a main floor bedroom or bath.
The 3 Tier Accessibility Plan helps you tackle quick wins now, bundle medium items into a focused handyman visit, and reserve design time and budget for major changes.
| Tier | Typical jobs | Best handled by |
| DIY today | Decluttering, plug in lights, basic hardware swaps | Homeowner |
| Handyman projects | Grab bars, railings, small ramps, minor plumbing or electrical | Small project handyman |
| Larger renovations | New main floor bath or bedroom, major layout changes | Designer or general contractor |
If you’re local to the North Shore or Metro Vancouver, encouraging in place home modifications guide and services can help you knock off a big chunk of the “handyman projects” list in one visit and because we focus on small projects only, you’re not competing with full scale renos for time.
Step 1: Safer entrances, paths, and parking
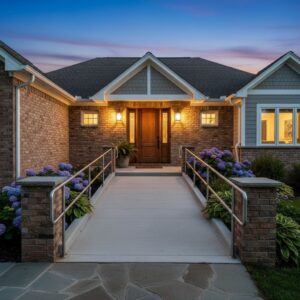
A gently sloped ramp, sturdy handrails, and good lighting are core accessible home modifications at any main entrance.
Because many falls happen at the door, start with the front entry, garage entry, and key patio doors.
What makes an entrance safe and accessible?
- Provide at least one step free entrance if possible, even if that’s through the side or back.
- When steps are unavoidable, add a sturdy handrail on both sides where space allows.
- Consider a properly built ramp or platform if someone uses a wheelchair or scooter.
- Keep pathways at least 36″ wide so a wheelchair or walker can pass comfortably.
Permanent ramps and handrails should be framed and anchored like any other structural element. It’s often worth a quick code review with your designer or building official, especially in older homes.
Doors, thresholds, and hardware
- Swap round knobs for lever handles that are easier on arthritic hands.
- Aim for a clear door width of 32″ to 36″ for wheelchair accessible home modifications. This may mean changing hinges or replacing the door slab.
- Reduce threshold height and use beveled transitions so small wheels don’t catch.
- If possible, add a no step, covered drop off zone in the driveway with a clear path to the accessible door.
Lighting and surface safety
- Install motion sensor or dusk to dawn lighting at entrances and along pathways.
- Use non-slip treads or coatings on exterior steps and landings.
- Make sure house numbers are large, high contrast, and well lit.
For more design ideas around exterior accessibility, the Rick Hansen Foundation has helpful Canadian focused resources.
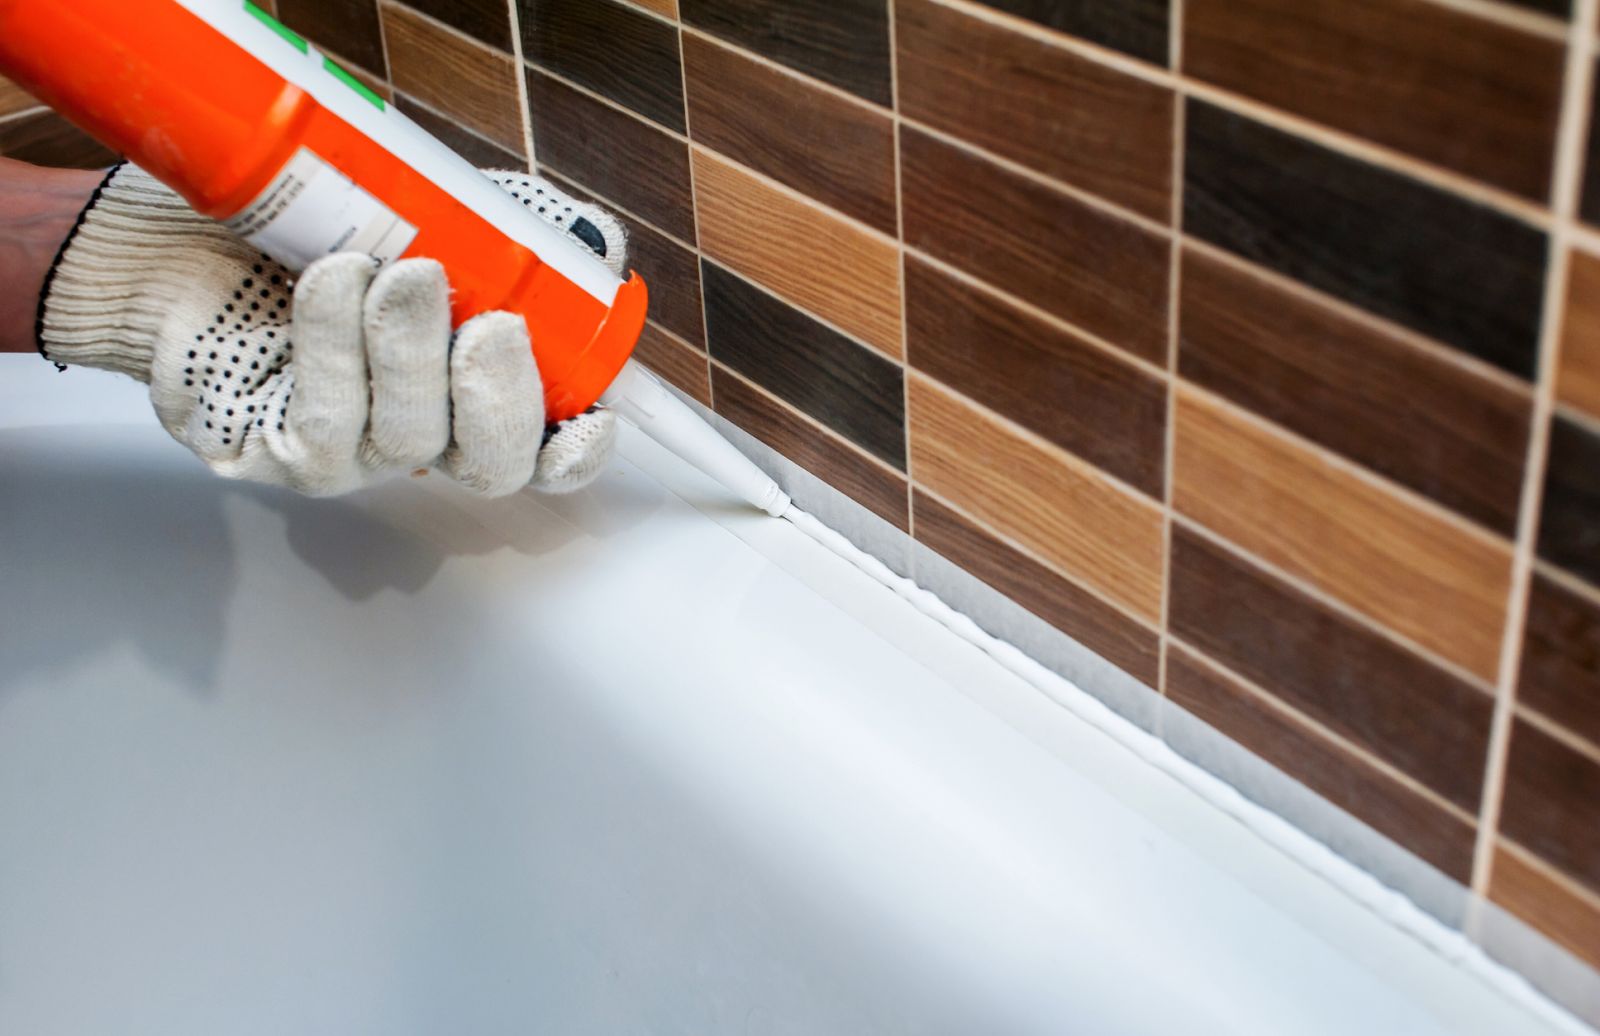
Step 2: Bathroom upgrades for comfort and safety
Bathrooms are where accessibility planning makes the biggest day to day difference; water, tight spaces, and hard surfaces don’t forgive many mistakes.
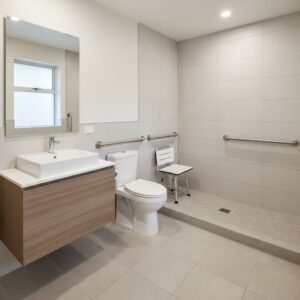
A curbless shower, secure grab bars, and slip resistant flooring are high impact bathroom accessibility upgrades.
Canadian and B.C. authorities report that falls are the leading cause of injury among older adults, often at home. For more tips, see the federal fall prevention guidance and B.C. fall prevention resources.
Showers, tubs, and toilets
- Prioritize at least one walk in or roll in the shower with a low or curbless entry.
- Install a hand held showerhead on a slider bar and a fold down or built in seat.
- Choose a comfort height toilet (around 17″ to 19″ to the seat) with room at one side for a transfer from a chair.
- If you keep a tub, consider a lower apron and grab bars for easier transfers.
Grab bars and reinforcement
A grab bar is only as strong as what’s behind it. We often:
- Open the wall and add blocking (solid wood backing) around the toilet, in the shower, and beside the tub.
- Install grab bars at 33″ to 36″ height, positioned where the user naturally reaches.
- Choose bars that match other hardware so the space feels like a thoughtfully designed bathroom, not a hospital.
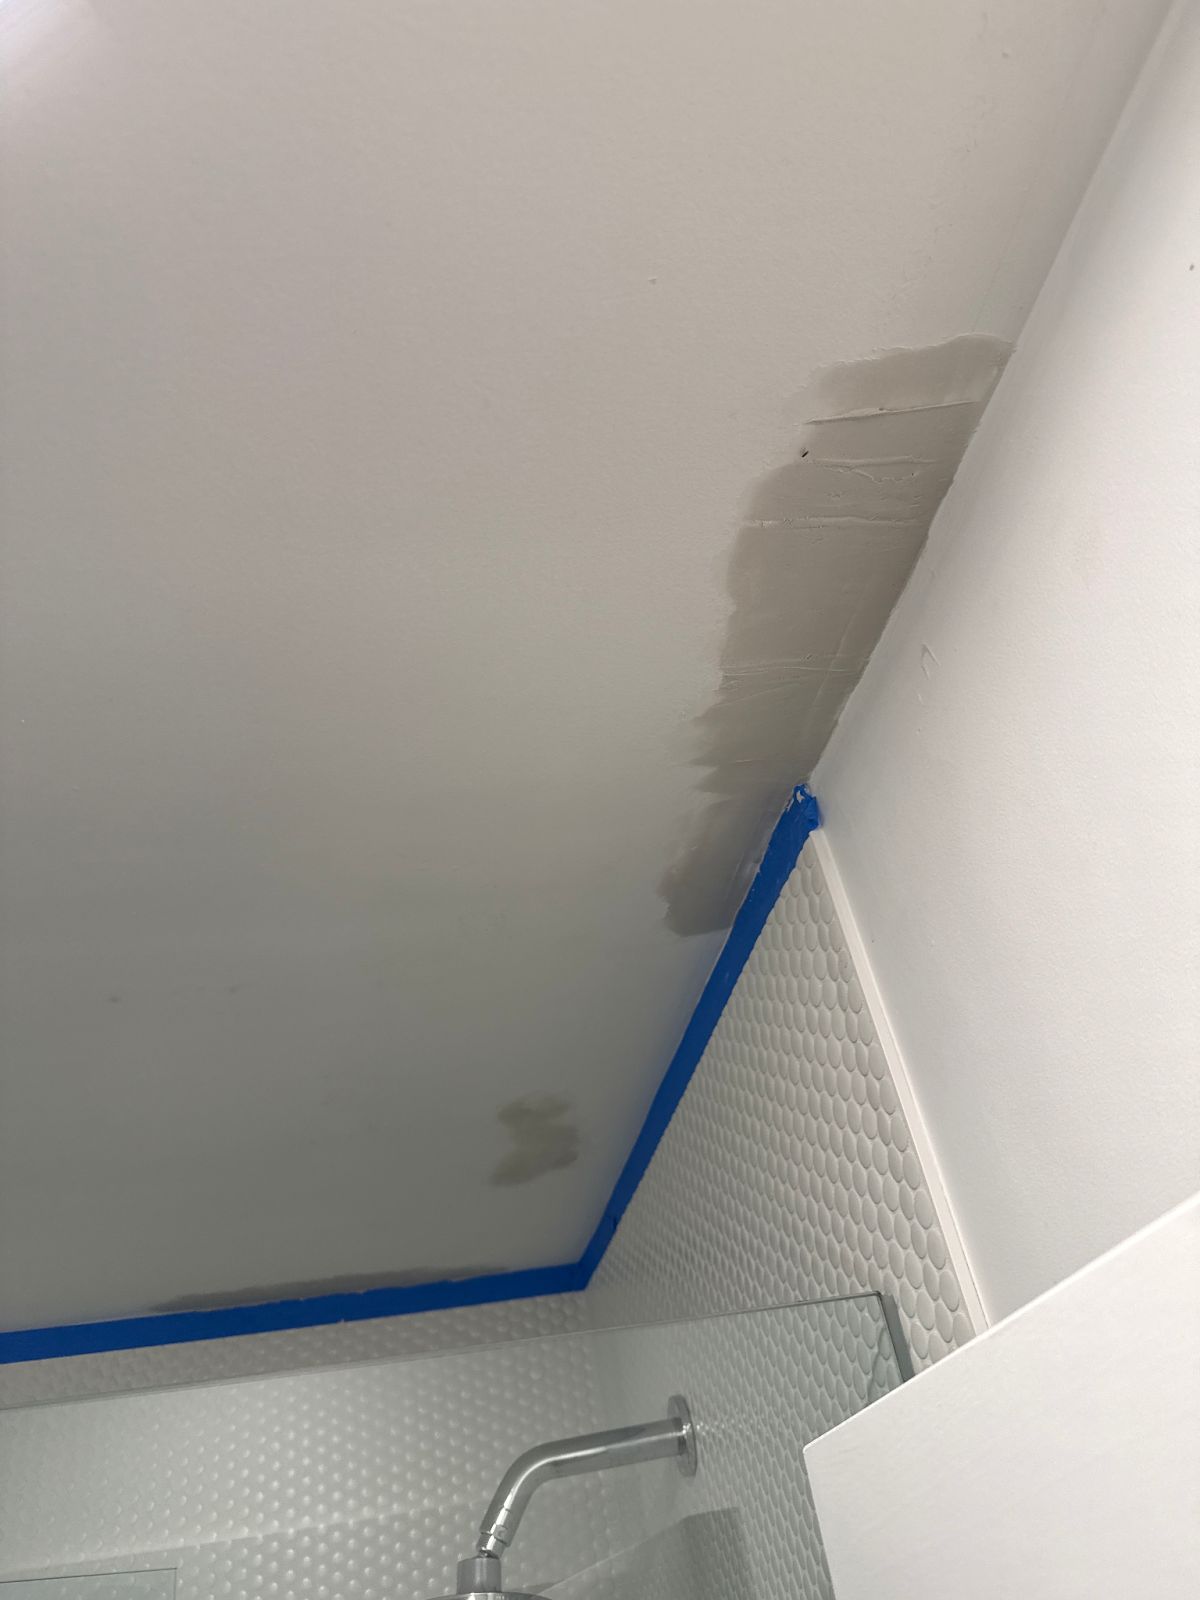
If you’re in a condo or townhome, talk with your strata before opening walls. Our team handles these smaller projects regularly and can work within building rules to minimize disruption, including any necessary drywall and surface repair after blocking and grab bars are installed.
Flooring, sinks, and storage
- Use slip resistant tile or sheet flooring rated for wet areas.
- Switch to a wall hung or open base vanity if a wheelchair needs to roll under.
- Lower at least part of the counter so someone seated can reach the sink comfortably.
- Install D shaped pulls on cupboards and drawers for easier grip.
Step 3: Kitchen and laundry accessibility ideas
A few targeted changes can make cooking, cleanup, and laundry much safer without a full renovation.
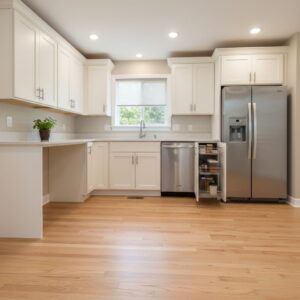
Clear floor space, a lower work surface, and easy to reach storage are key accessible home modifications in the kitchen.
Layout and clearances
- Keep at least 40″ to 48″ of clearance between counters so two people or a wheelchair and a helper can pass.
- Reserve one section of counter at a lower height (around 30″ to 34″) for seated prep work.
- Choose a side by side or French door fridge so both standing and seated users can reach items.
Appliances, storage, and controls
- Place the microwave at counter height instead of above the range.
- Use pull out shelves in base cabinets and tall pantries.
- Install front mounted controls where possible so you don’t reach over hot surfaces.
- Group frequently used items between shoulder and knee height for standing or seated users.
Laundry room tweaks
- Choose front load machines on raised platforms so you’re not bending to the floor.
- Keep a sturdy folding surface beside the machines.
- Hang rods and shelves lower and bring detergents “down to the user,” not up on a high shelf.
If you’re planning a broader kitchen refresh, our step by step guide to a recentholiday kitchen renovationpairs well with this checklist.
Step 4: Bedrooms, hallways, and living areas
In the spaces you use most, aim for easy movement, clear sightlines, and minimal trip hazards.
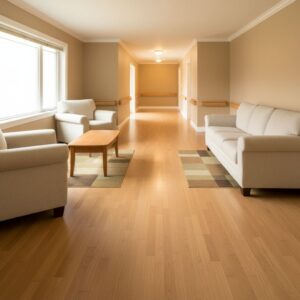
Clear pathways, firm seating with arms, and visible handrails help bedrooms and living areas stay safe and accessible.
Bedrooms
- Look for a way to have a bedroom and full bathroom on the main floor, even if it means converting a den or formal dining room.
- Allow a 60″ turning circle beside at least one side of the bed for a wheelchair or walker.
- Set the bed height so feet land flat on the floor when sitting at the edge.
- Use reach friendly closets with lower rods and shelves.
Hallways and doorways
- Keep hallways clear to at least 36″ wide no narrow console tables or shoe piles.
- Replace door knobs with levers and consider pocket doors in tight areas.
Living and common areas
- Arrange furniture so there’s a clear path between key zones without tight squeezes.
- Choose firm seat sofas and chairs with arms that make standing up easier.
- Use cordless window coverings or large, easy to grab wands.
- Tape down or remove loose rugs and cords that catch walkers or canes.
Together, these small adjustments often mean the difference between needing help for every move and feeling independent.
Step 5: Whole home safety, lighting, and smart tech
Once key rooms work, zoom out and think about lighting, stairs, and alerts across the whole home.
Better lighting everywhere
- Swap dim fixtures for bright, diffused LED lighting, especially on stairs and in hallways.
- Add night lights from bedroom to bathroom so paths are visible at 2 a.m.
- Use rocker or smart switches at reachable heights, or tie key lights to voice control.
Stairs, rails, and indoor ramps
- Install continuous handrails on both sides of stair runs where space allows.
- Add high contrast nosing strips on stair edges so each tread line is easy to see.
- In split level homes, consider a short interior ramp instead of a single step between levels.
Smart home and alerts
- Use video doorbells and smart locks so you don’t rush to the door.
- Connect smoke and CO alarms that send alerts to phones and smart speakers.
- Add voice controlled plugs for lamps and small appliances.
For Canadian guidance on accessible housing design, check the federal government’s information on its official website. In B.C., the province publishes BC Building Code accessibility requirements that cover adaptable dwellings, clearances, and reinforcement for grab bars and handrails; a local contractor can help you apply them in a real home.
If you’re in our service area, we can usually bundle many of these whole home tweaks into a single home safety and accessibility visit. Our interior and exterior carpentry services cover the railings, stairs, and small structural changes that often sit at the top of that list.
Budget, permits, and choosing the right help
One of the biggest questions we hear is, “Where do we start so we don’t blow the budget?” A simple rule: start where a fall or injury would hurt most and where you use the space every day.
Budget and permits at a glance
- List all potential projects, then highlight the top 5 safety items to tackle in the next 6–12 months.
- Mix low cost fixes (lighting, hardware, layout) with one or two bigger upgrades per year, using The 3 Tier Accessibility Plan to phase DIY, handyman work, and larger renovations.
- Ask for itemized estimates so you can phase work without losing the overall plan.
- Confirm with your municipality or contractor which items need permits: small additions like grab bars, short ramps, and extra handrails often do not, while structural changes, plumbing moves, and new electrical circuits usually do.
Choosing a handyman or contractor
When you’re comparing quotes for wheelchair accessible home modifications, look for:
- Training in accessibility or aging in place work (for example, Adaptiv Home training).
- Photo documentation of blocking and reinforcement behind grab bars and rails.
- Clear warranties plus proof of insurance and WorkSafeBC coverage.
- Respectful, low pressure communication you should never feel rushed into a big decision.
If you’re not sure where to begin, we can walk the home with you, build a phased plan, and usually respond to your estimate request the same day.
Room by room accessible remodeling checklist
Use this summary list as a quick reference. Check off what you’ve done and circle what you want priced out.
Entrances and exterior
- ☐ At least one step free or ramped entrance
- ☐ Handrails on both sides of main stairs where possible
- ☐ 36″ wide, clear, slip resistant pathways
- ☐ Lever handles and low, beveled thresholds
- ☐ Motion sensor or dusk to dawn lighting
Bathroom
- ☐ Walk in or low curb shower, plus seat
- ☐ Comfort height toilet with space for transfers
- ☐ Blocking and secure grab bars (toilet, shower, tub)
- ☐ Non slip flooring rated for wet areas
- ☐ Accessible vanity and D shaped pulls
Kitchen and laundry
- ☐ 40″–48″ clearances between counters
- ☐ At least one lower work surface
- ☐ Pull out shelves and reachable storage
- ☐ Front mounted controls where possible
- ☐ Front load laundry with nearby folding surface
Bedrooms and living areas
- ☐ Main floor bedroom and full bath, or plan for one
- ☐ 60″ turning space beside the bed
- ☐ Clutter free, 36″ wide paths
- ☐ Firm seat chairs and sofas with arms
- ☐ Loose rugs and cords removed or secured
Whole home and safety
- ☐ Bright, even lighting and night lights
- ☐ Continuous stair handrails and visible stair edges
- ☐ Smart doorbell, locks, and alarm alerts
- ☐ Thermostats, switches, and outlets at reachable heights
If you’d like a second pair of eyes on your checklist, our team can schedule a short on site walk through in North Vancouver, West Vancouver, Vancouver, Burnaby, Coquitlam, and nearby communities to help you prioritize.
FAQs
How much do accessible home modifications cost in Metro Vancouver?
Many small accessibility projects land in the few hundred to few thousand dollar range per visit, while larger renovations like a curbless shower or new main floor bathroom are closer to standard bathroom or addition projects.
Do I need a permit for ramps, grab bars, and handrails?
Simple upgrades such as grab bars, short ramps, and extra handrails often don’t require a full building permit, but structural changes, plumbing moves, and new electrical circuits usually do, so confirm requirements with your municipality or contractor before work starts.
How long do small accessibility projects usually take?
Many quick upgrades like installing grab bars, improving lighting, or adding a short ramp or second handrail can be done in a single visit or a few days, while widening doors or reworking a bathroom layout takes longer and is often phased so parts of the home stay usable.
Is there funding or rebates for accessibility upgrades?
Funding and rebates change over time, but tax credits and grant programs for accessibility and aging in place upgrades are often available through the federal and B.C. governments and local agencies, so check with an occupational therapist, your municipality, or a contractor familiar with accessibility work.